Page 1 of 1
Pertronix install Tips
Posted: Tue Jul 14, 2015 1:28 am
by Goatwerks
Here are a few Pertronix install tips / pic's.
First,there are 3 basic distributor types, Cast Iron, Aluminum , and Aluminum Mil Spec.
There are only 2 positions to mount the module on the new plate, left or right, left side is for Mil Spec and cast iron units, right side for Aluminum Civilian type.
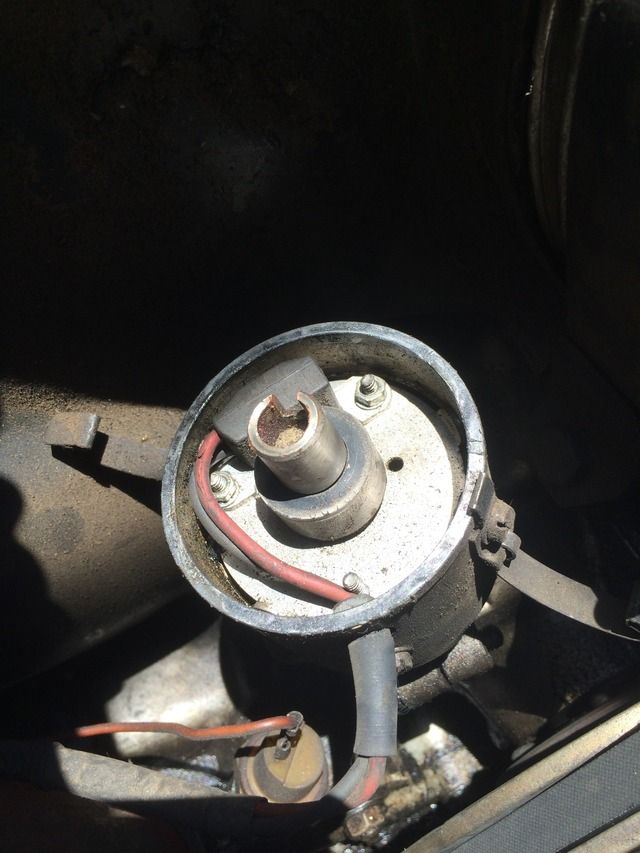
Here is a picture of Aluminum type installed.
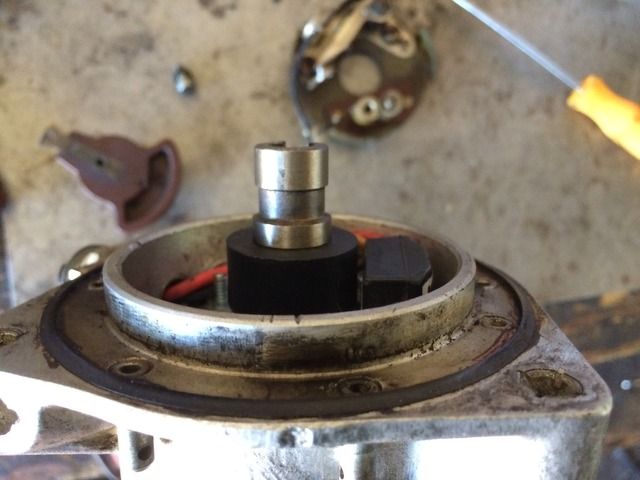
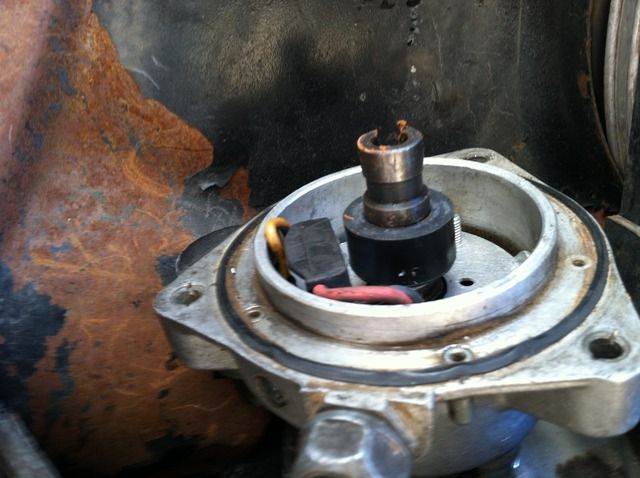
Here is the Mil Spec unit. For these, you must put a spacer under the module to raise it into alignment with the center ring( I used 2 slightly larger nuts under the module).
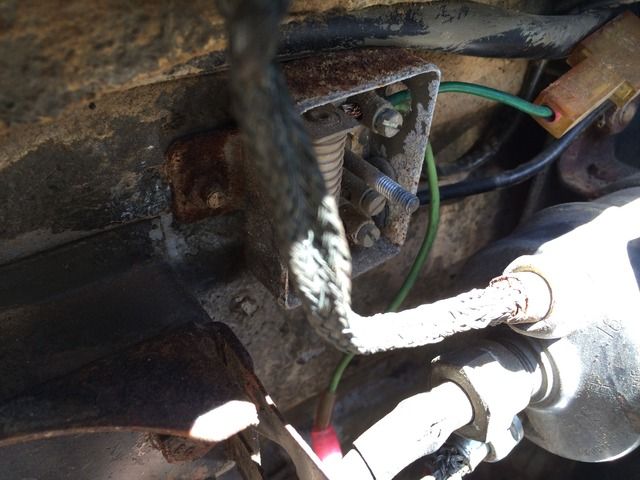
This is the power wire , just tap power from resistor input on Mil Spec units.
Re: Pertronix install Tips
Posted: Tue Jul 14, 2015 12:28 pm
by blazing928
Thanks a billion times Jim
Re: Pertronix install Tips
Posted: Thu May 26, 2016 1:19 am
by flyco10
Hi, for the mil spec unit, do you need to sand down the distributor finger by 1/8 inch like on the pinzgauer video or can the finger be assembled without any modification. Which Pertronix kit is it ?
tks
Re: Pertronix install Tips
Posted: Sun May 29, 2016 5:26 am
by Goatwerks
no mod to the rotor. Pertonix module available from
http://www.expedition-imports.com
Re: Pertronix install Tips
Posted: Thu Aug 11, 2016 8:45 pm
by Goatwerks
Added this to thread, also posted to Off Road Portal.
So I came across a weird one, may shed light for others. Upon installing a new unit, the engine would not start(no spark). Since I have never found a defective module I decided to investigate before writing it off as bad. First off the Pertronix unit is 2 parts, module and pole piece.
The pole piece(trigger) contains 4 small magnets, the magnets are arranged by pole position(North or South).
I started by testing a known good module(on my Haflinger), as they tested alike next step was testing the ring. As soon as the ring was swapped with mine, it sparked fine and started. Next the new pole piece was tested on my Haf and it would not produce a spark, so after some thought on how this sensor makes a signal, a compass was the correct diagnostic aid.
Using the compass on a flat surface, I rotated the ring next to it notating magnetic direction. The ring that worked was oriented (bottom view), flats to right and left starting upper left and then clockwise, North, South, North, South.
The ring that would not work had all four magnets North facing.
It was an easy fix(used thin blade at bottom of ring to pop retainer loose, re-orient magnets and super glue retainer).
Of note, I can see how easy it is to make this mistake in small batch manufacture as four cylinder pole piece have all four facing North and it is the same plastic housing with a modified lobe mount bore.
Been swamped with heavy work, more posts as soon as I get caught up

Re: Pertronix install Tips
Posted: Wed Aug 31, 2016 12:28 am
by tpond
Jim,
Thanks sooooo much for posting this! I just tried to fire up my truck after a full engine rebuild, and ignition system upgrade... no spark... well my brand new Ignitor ended up having all four magnets facing North. After fussing around with the plastic cover and switching the magnets like you outlined, it fired right up!
Nice having a workable solution without sending it back to them!
Thanks again
Re: Pertronix install Tips
Posted: Wed Aug 31, 2016 7:26 am
by heinkeljb
Hopefully, both of you have let the manufacture know their quality control on their small batch construction is useless and needs tweaking! I wonder how many units have been sent back because of this issue?
John
Re: Pertronix install Tips
Posted: Wed Aug 31, 2016 5:10 pm
by tpond
After waiting on hold for 20 min, I did talk to someone. They helped me make sure that I had indeed followed the traditional troubleshooting steps properly. That narrowed it down to the Ignitor components itself that had led to the no spark situation. They just wanted to switch out the defective part...trouble is, they did not have any spares in stock... Once I fixed it (with Jim's notes), i did call back to let them know that the magnets were the problem. I suspect that the whole batch is faulty.