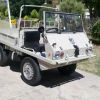
Having posted several times about the problems I have been having with the fulcrum pins on my sad 1967 Haflinger rebuild, I feel I should continue the saga to the end . The end being, new ones fitted and working. That will be part 3.
The Haflinger had obviously had a hard life mainly off road from new, on a Scottish Grouse Moor Estate, later on a small holding/farm and then at least 15 years standing, I would say in the open.
So with vehicle stripped down, body/floor pan off, I cleaned off years of caked mud, oil and rust and then had the chassis blasted and primed. All the time learning how the systems worked and the many strange design features etc. I realised that on the left side, 2 of the 4 fulcrum pins were turning with the up and down action of the swinging arm suspension. So they were seized in the swinging arm where the "helicoil" are. I had noticed oil in this area. So I guessed all was not right. Most of this I have probably posted before, but to keep the continuity I continue.
Once the swinging arms , front and back removed and several weeks soaking in release fluid. I tried different methods to get the pins out. All the usual suggestions. The main problem getting something to hold the pin in order to try and turn it. In the end with several broken tools I decided to take the problem to a motor engineer company est.1922 with a good reputation. They managed to get one of the pins out that was not seized in the swinging arm. But declined to do anymore, referring me to another workshop with bigger and more expensive machines! I did that. They made up some metal fittings that were welded on and in the pin slot.See photo. I was hopeful. With the first attempt the engineer broke off some of the ally casting aside the swinging arm.
After repairing that they gave up. But offered to Spark Erode the pins out at £250 a pin (3 left) Way more than I could afford. They did not charge me for the welded fittings.
Time scale to this point -- about 3 months. Took them back home , bought another gallon of release fluid and started talking nicely to bits in question. So next With the bonus of having something to put the wrench to I dully tried again with intense heat and a 3 foot bar on the wrench. Eventually something moved. I realised it was the helicoil and the pin together. No help at all. In fact made the situation worse. I tried quite a bit of mental preparation, sleeping on it, reseaching Google, even talking it over with mates in the pub (do you remember those pre- lock down days?)
It ended with me cutting the pin with a Dremmel and a thin cutting disk in the angle grinder. You can just about get in there. Then cutting the helicoil a bit then turning it and cutting a bit and then again till a slice came off and you could remove it. Then wind it out again and cut another slice off. See Photo.
Where the 2 pins that were working correctly came out , I had to cut the helicoils out by hand with a hacksaw blade. See Photo.
One of the stubborn pins I drilled out using masonary drill, tungsten carbide tip, starting with 3 mm up to 10 mm. Yes they did work and dry no lube! Anyway after cutting the pin, putting a bolt through the 10 mm hole and welding a nut on to the helicoil, so we could turn it out.
So I now have 2 swinging arms ready to rebuild. I am still deciding which way to go on that. Plain shank fulcrum pins are available in 18 mm and 14 mm. Both use bearing materials instead of the weird helicoil threaded system. I am going down the plain shank route . Having worked in the Hovercraft industry with craft up to 20 tons where we used a bearing material on the rudders and elevators and also under the skirt on winch systems.There it is wet and muddy and corrosive (bit like a haffy off road) The bearing material is South African. Vesconite self lube plastic hybrid. http://www.vesconite.com
I have bought the quantity I need in UK, not that expensive. My plan is to turn up 2 bearings per pin. Top hat shape. Do away with the shims , oil seals. block up the lube holes in the pin and fit with grease placing one bearing in from each side of the arm hole in the place of the helicoil. That hole is approx 24 mm diameter. So not sure yet wether to go for the 14mm pin or 18 mm. If I use the 18 mm then the bearing would only have a wall thickness of about 3mm. But if you watch the video on You Tube of PROKSCHI and the various fulcrum pins, thats the same as he shows but uses a different bearing material and he leaves the oilways open. https://www.youtube.com/watch?v=Gsf3AB2OIp8. The 14 mm pin would give a bigger wall thickness on the bearing. I would need to still use the o'ring on the inner end of pin. Might still need to shim bearings each side.
Well thanks if you stuck with me through all this. I will update when I decide which way to go on the pins/bearing. Any ideas appreciated.
My floorpan is being rebuilt by a body shop nearby and progress is really good on that. Hopefully should have it back next week. New exhaust valves and guides in the heads, just waiting to get a stud drilled out and helicoiled, then I get to rebuild the engine.
Cheers for now.
Jeff Keep well.
Fulcrum pins part 2.
-
Tajman
- Posts: 86
- Joined: Fri Sep 27, 2019 8:11 pm
- Location: Between Portmouth and Southampton. Hampshire .UK.
Fulcrum pins part 2.
- Attachments
-
-
-
-
AustHaflinger
- Posts: 2472
- Joined: Sun Jan 06, 2013 1:27 am
- Location: Canberra Australia
Re: Fulcrum pins part 2.
Hi Jeff and thanks for the update and summary. I have been following your saga but unfortunately have not been able to offer much in the way of advice as thankfully for me I have not had the issues you have - my fulcrum pins have always come out the way they were meant too.
I hope your ideas on the way ahead all work out and as you have done thus far I am sure looking forward to reading about your success.
Good luck
Garry
I hope your ideas on the way ahead all work out and as you have done thus far I am sure looking forward to reading about your success.
Good luck
Garry
Haflinger 700AP (73)
Range Rover Sport TDV6 (07)
Landrover FC 101 (77)
Landrover Series 1 SWB Station Wagon (57)
Landrover Series 1 SWB (57)
Jaguar E-type Roadster V12 (71)
Jaguar XJ12C (76)
Range Rover Sport TDV6 (07)
Landrover FC 101 (77)
Landrover Series 1 SWB Station Wagon (57)
Landrover Series 1 SWB (57)
Jaguar E-type Roadster V12 (71)
Jaguar XJ12C (76)

Re: Fulcrum pins part 2.
Jeff, as you have pointed out, there are various weird and wonderful Steyr Puch Haflinger design methods! Some better than others....
The fulcrum pins being one of them. I did think you were going to have to get an angle grinder in there after the other attempts failed.
Glad to hear you now have all the pins out and that you are contemplating new methods of bushing the pins. I will probably have to attempt the pins on at least the front left hand side of Lurch as that swing arm has some play in it which i think is probably more than the Steyr Puch designers / engineers mention in the workshop manual as being expected!
I like the idea of yet more grease points.
John
Haflinger 703AP LWB 1973 - (Once owned by Lady Sutherland & Sons.) Now called "Lurch" !
Have you hit the "DONATE" button at the bottom of the page after reading this post? Many thanks if you have!!
Have you hit the "DONATE" button at the bottom of the page after reading this post? Many thanks if you have!!